GSMA has hosted its inaugural drone race tournament this year at MWC Shanghai. There are top pilots coming in from all over the world that will showcase their skills in flying the latest drone FPV (first person view) technology through their specially designed course.
Pilots Introduction:
Luke Bannister,
Maciej Poschwald,
Gary
Malte
Group Photo:
(From left to right: YC,Gary, Mac, Luke, Malte, Danny, Noa)
Want to become familiar with the two different types of lithium-ion batteries: Lithium Cobalt Oxide (LiCoO2) and Lithium Iron Phosphate(LiFePO4) Lithium Cobalt Oxide, one of the most common Li-ions, has the chemical symbols LiCoO2 and the abbreviation LCO. And Lithium Iron Phosphate, has the chemical symbols LiFePO4 and the abbreviation LFP. Let us see their comparison.
1. Comparison of Volume Energy Density
2. Comparison of Quality Energy Density
3. Comparison of Nominal Voltage
4. Comparison of Normal Temperature Pulse Performance
5. Comparison of Normal Temperature Pulse Cycle Performance(Blocking Temperature 55℃)
6. Comparison of Pulse Discharge Performance(Temperature - 20℃)
7. Comparison of Cycle Life(Temperature 20℃)
8. Comparison of Full Electric High Temperature Storage Performance
9. Comparison of Safety Performance
In general, they have their own advantages and disadvantages:
Thanks a lot for all you guys voting for Tattu 1550mAh 95C 4S, making Tattu the most voted battery amongst all the other famous brands. Let's meet in MultiGP Open in Aug. The 15 winners of our Voting Giveaway will be announced an hour later. Keep tuned!
To prepare this race, you can go to GensTattu to buy more batteries.
Stinger X210 is an OPENSOURCE Racer frame that’s so cute. Main body part is 3D printed canopy! If made of ABS or PETG it’s really strong (you can probably stand on it) and you can get a nice finish (more about finish in my tutorial below). It holds FPV camera nicely in place with easy adjustable tilt angle. In the back you have vtx connector mounting hole and good intake/exhaust holes for ventilation. On the sides there are holes for cables and main battery strap.
It has 4 identical arms that can be made in 3 or 4mm CF. I prefer 4mm, but for some weight reduction you can go lower aswell. It has screw “locking” mechanism that allows you to replace arm without disassembling whole build. Arms has also motor ventilation holes (rare!) and motor bumpers. They are wide enough for most “barebone” ESCs. Center will fit the 30.5 and 20mm FCs and below you have room up to 4s 2000mah batteries with OPTIONAL battery protector.
This frame is opensource, that means that you can make it yourself or ask your local buddy with machines to print or cut the parts of frame for you! That means cheap non-profit frame with local spare parts, fully customizable and upgradeable. If you are Banggood or Hobbyking or someone similar, you should contact me first!
Specs:
– Fully symmetrical X
– 210mm motor diagonal
– Quickly replaceable arms
– Very sturdy frame!
– Printable and customizable canopy!
– Really aerodynamic frame!
– Minimal screws and spacers
– Clean build
– Optional battery protector (12gr)
– around 450gr RTF
Opensource rules:
Makers: No commercial selling of this frame without my approval! You can make it for yourself, your friends or by requests!
Modifiers: You can edit files and modify frame, canopy etc. – but please share modified files so others can use them! No commercial selling of derivatives!
Pilots: You can get this frame locally via CNChubs or 3DHubs by sending files OR by asking for parts in this group. I bet there will be makers in your vicinity.
To make your 3D print look cool, stronger and more resistant to sunlight follow this tutorial:
I used for building next equipment, which proven to be good choice:
This selection is quite cheap and turned out to be really good! It flies on rails, power on demand, all acro stuff! No BEC needed, no modifications, less than 2h build time. You also have OSD for voltage and RSSI and maybe some other things if needed.
We start the build with ESC and motor soldering. If you want to make it real good, with low resistance and good solder joint, than you shorten the motor wires than split the wire end and solder on both top and bottom of the ESCs.
We do this on all 4 sets. We make 4 sets identical, because we will change motor direction in software. We also add signal cable and main power cables, that are supplied with ESCs.
Now we can complicate a little and turn the ESCs so that MOSFETS are facing the arm. We will add heat transfer material between the ESC and arm to allow arm to act like heat sink. Well… you can also just put ESCs in the heatshrink and let them cool by the motor air-flow.
Here you can see some of the heat-transfer material, that will also insulate esc from carbon fiber on the arm.
And shrink over the boom + ESC, to protect it nicely.
We now have 4 finished arms. We make 2 symmetrical arms.
This image shows how easily is everything put together. We solder rear 2 escs to the XT60 connector directly, and front pair via Y cable, that is also soldered to XT60 directly. Than we have only 1 more thin wire for FC – directly from 4s. Camera and VTX will be powered also from 4s directly, but via FC, to save some wire.
Instead of heavy and bulky PDB, we solder everything to XT60 and cover with heatshrink in the end.
I’ve soldered motor signal wires directly to the FC because I didn’t have suitable connector, but most important is that I made 2 connectors, which I got with camera and vtx and connected them to FC directly (+, – from 4s and video in/out), so I can just mount the canopy and hook up the cables. This is basically it… the build is finished with this
I have one less quality picture how camera and videolink are mounted inside the canopy…
To mount the canopy and have battery protector in the same time, I’ll use M3 stud inside 35mm spacer. If I don’t need battery protector, I’d just use regular screw.
And it’s finished! 2 hours and that’s it
I’ve found a nice way to shave off some weight and resistance 6-10grams… now I can use battery protector without weight worries
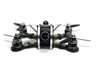
Armattan Japalura 4 is a good frame to build a FPV quad, its frame Weight is about 56g and the motor to motor is 174mm, it is small and light, many people like use this frame to build a FPV quad. When we decided to build a Armattan Japalura 4 FPV quad, we should search and buy other parts for FPV QUAD, such as motors, lipo batteries escs, FC and others. (There is an Armattan Japalura 4 build article can help you choose your parts ) This article is mainly teach you how to choose Lipo batteries for your Armattan Japalura 4.
From Armattan Japalura 4 official, they recommend 3s lipo – 4S lipo, 650mAh-850mAh; but all the materials are chosen by yourself, so you can decided what battery you need. I recommend you can choose 3s-4s battery, 850mAh-1300mAh and high discharge rate(I like 75C); and the batteries you chose should be light weight and high quality, there are some lipo batteries for Armattan Japalura 4, I think these are very fit in Armattan Japalura 4. Tattu 850mAh 4S 75C Lipo battery
Specs:
Minimum Capacity: 850mAh
Configuration: 4S1P / 14.8V / 4Cell
Discharge Rate: 75C
Max Burst discharge Rate: 150C
Net Weight(±20g): 107
Dimensions: 61mm Length x 30mm Width x 30.5mm Height
Power bank
serve as an extra battery' or external charger for your phone or other
electronic devices. It is a portable power source built of rechargeable
battery, packed in a small case that can be carried in a handbag or
purse. It has at least one input for charging and another recharging
port that can be connected to a standard USB cable that can recharge
portable electronic devices like smart-phones, media players and tablet
PCs.
Most of the newest power-bank models, arrive with built-in Lithium
polymer battery, which known by high efficiency and long lifetime.
How do I know which power bank suits my device?
Depending on individual needs and requirements, there are several general criteria to consider when selecting a power bank:
a) Capacity
For example if your phone battery is 1500mAh and is 0% now, a power
bank with 2200mAh can charge your phone 1 time. If your phone battery
is 3000mAh and is 0% now, a power bank with 2200mAh will not be able to
charge your phone to full because the phone battery capacity is higher
than the power bank. If you require a power bank that is able to charge
your phone several times, you need a power bank with higher capacity.
b) Number of output
1 output to charge 1 device, 2 outputs to charge 2 devices.
c) Output specification
1A-1.5A output is generally for smart-phones, 1.5A-2.0A output is generally for tablets.
How long do I need to charge the power bank?
It's depending on the REAL CAPACITY of the power bank. The larger
REAL CAPACITY, the longer charging time may required. Different charging
methods may result different charging time as well. Charging with the
original charger will be faster than charging with computer USB port.
How do I charge the power bank?
You can charge your power bank via the charger that came with your phone, computer USB port or using other power bank.
What is the lifespan of the power bank?
Generally, a properly maintained power bank can retain up to 80-90%
of its original capacity at 400-500 charge and discharge cycle (charge
then discharge = 1 cycle, regardless of whether you charge/ discharge it
partially or fully). Until your power bank no longer holds sufficient
charge to meet your needs, you may choose to purchase a new one.
Where to buy power bank?
Buy power bank online you can choose Tattu 10400mah power bank,
the capacity in fact is 10800mah, and use Lithium Polymer battery cell,
high weight and high quality. It charges the iPhone 6S almost 5-6
times, iPad air2 almost 1-1.5times or iPad mini4 1.5-2 times, and also
charge Android smart-phones and others.
General Information
– A = Ampere – mA = mili Ampere – mAh = mili Ampere hour – Output from computer’s USB port = about 500mA – Output from wall plug (3-pin plug) = varies (please refer to specific wall plug specification) – Output from power bank USB port = varies (please refer to specific power bank model)
Source:http://www.genstattu.com/blog/faq-about-basic-knowledge-of-power-bank/
The Armattan Japalura is the little brother to the popular Armattan Chameleon. The components used here will work on either the 3" or the 4" baseplate. Traditionally 1407 motors have been used exclusively on 3" builds, but a new trend has emerged putting 4" props on a 3" powertrain. The advantage is a light-weight build with the flexibility to choose either 3" or 4" props and carry an HD camera. This particular configuration can easily handle a Mobius mini.
As the "younger sibling" to the Chameleon, the Armattan Japalura is the fanciest micro frame around, and the second design in Armattan's selection that features aluminum protection. Inspired by many of the same principals as the Chameleon, the Japalura is a lighter, more compact package that still supports many of today's FPV standards. This "4 inch" frame can handle full-sized miniquad guts, houses your standard HS1177 camera, and shields everything but the battery with two 4mm thick 6061 aluminum ribs.
As with any Armattan release, some of the best features of this frame are the lack of restrictions you have when building. For example: like usual, the Japalura supports a 30.5mm center stack up to 28mm high. In addition, the adjustable angle on the aluminum VTX mount supports a variety of transmitter options. Another feature is the option to mount the battery on the top or the bottom of this machine, just in case you have a strong preference. Lastly, if built with an eye on the weight of all the components, you ought to be able to skate by underneath the United State's FAA Registration restriction of 250g.
Available in either silver or purple, this frame looks smashing when paired with Oomph 1407 motors.