显示标签为“FPV drone”的博文。显示所有博文

2017年10月14日星期六

Parrot Mambo Mini Drone

The Parrot Mambo is a mini FPV drone with cannon and interchangeable grabber. It’s small enough to fit in the palm of your hand, and come with lightweight, making it perfectly suitable to flight indoors. It supports modular accessories and it’s those accessories that set this latest Mambo apart from similar drones. It’s a small plastic drone that’s intuitive to fly and lots of fun. It can be flown using your smart phone.
Features
  • Indoor and outdoor minidrone
  • Grabber and cannon accessories
  • Bluetooth control from a smartphone (controller optional)
  • 30 minute charge time for 9 minutes flight
  • 5m/sec maximum speed
  • 3-megapixel camera / 1GB internal storage (not expandable)
  • Weight: 63 g (without bumpers or accessories)
  • Dimension: 71 x 71 x 18 mm
  • 60 FPS vertical camera; Streaming and Recording HD 720p 30 FPS FOV 120°
  • 660 mAh Lipo battery
 Performance
It has never been so easy to escape thanks to the Parrot Flypad which lets you fly your Parrot Mambo over a distance of up to 100 m. Fly not only farther, but also longer with the new high-performance Power Battery lasting up to 10 minutes. There are 3-axis gyroscope and accelerometers inside with a downward-facing ultrasound sensor all working to make for generally stable flight. The Mambo comes with blade protectors that are easy to pop on and off and when you first start flying it around they’re an essential addition.
Cannon
Interact with other drones and pilots using the included Cannon accessory. Attach the Cannon to your Parrot Mambo and let the games begin! Test your skills with target practice, and fire these little balls at a pyramid of cups or other light-weight targets. You can load up to 6 pellets into the Cannon at a time. The first pilot to knock everything down wins! This feature is very similar to Xiaomi mi drone 4K.
Grabber
Attach the Grabber to the Parrot Mambo and use it to transport mini-objects that weigh up to 4g to a new location. Simply activate the claw on the home screen of your FreeFlight Mini app, carry something up into the air, and put it down wherever you want.
Safety First
Thanks to an advanced flight controller and high performance sensors, the Parrot Mambo is easy to pilot and control. In addition, the autopilot functionality ensures that it will stay stable and hover, even if you let go of the controls. Lastly, the Parrot Mambo comes equipped with and automatic ‘shutdown system’ that cuts the motors off in case of a crash or collision.
Remote Controller
The controller looks and feels like a simplified Xbox controller, with two multi-direction sticks that control rotation, elevation and motion. There are a couple of buttons that activate special acrobatic moves (which you may want to avoid performing with the headset on, unless you have a barf bag to hand) and a button for take-off and landing.
Camera

The 0.3-megapixel camera really is not great. Think an old VGA webcam level of quality and you’ll hit the mark. It’s noisy and blurry and the colours are underwhelming. Still, it can still be relatively fun to get a top-down view of your living room. 
Battery life and charging
Best case scenario -no hull, no accessories -and you can expect up to 9 minutes of continuous flight. Throw in the extra weight of the hull and accessories and I found this closer to 6-7 minutes. Not amazing, but enough to have a quick round of fun. Thankfully, charging only takes 30 minutes when connected to a 2A USB adapter, which could’ve been worse.
You can pick up a spare FPV battery for less money. I would have said it’s worth stretching to the battery plus battery charger pack so you can be charging a second battery while the drone is in flight-otherwise the battery needs to be attached to the drone to charge. However, Parrot says this charger dock takes 1.5 hours to charge a single battery, which negates its usefulness.


Pros
  •  Fun and easy to fly
  •  Reasonably quick charge time
  •  Easy to set up
  •  Fun accessories
Cons
  •  Short flight time
  •  Mini pellets are really easy to lose
  •  Can only lift 4g using grabber
  •  Doesn’t do well in even light wind

2017年10月11日星期三

XJaguar FPV Racing Drone

The Intelligent motion UAV manufacturer called FLYPRO feibao drone produced a professional racing drone XJaguar, this drone is a competition for professional use for FPV tournament players and racing drones professional player . XJaguar is equipped with a 8-in-1 tower structure patent technology, highly integrated electronic speed control, flight control and figure such electronic equipment, overall configuration are using the Match-grade standard.

xjaguar
This drone’s  color is black and red.
xjaguar
8-in-1 tower structure patent technology, highly integrated electronic speed control, flight control and figure.
The UAV’s Power system contains motor, blades and battery.
xjaguar
The racing drones used by the 2305 motors. The pull of a single motor can reach 1300g, the whole thrust-weight ratio is 10:1. Blades used 5045 clover paddle.
xjaguar
The XJaguar’s price is about 270$, Core components Tower is about 120$, it is better choice for DIY users .

2017年6月7日星期三

Build Frog Race Frog Lite 218mm Quad


Frog Race Frog Lite is a beautiful frame with Carbon Fiber 4mm Arm, it's an easy build and weighs in at only 286g. I really liked this frame, and I decided to build a Frog Race Frog Lite 218mm quad.
About this build:
This build supports Dshot600 and offers OSD for voltage monitoring and a built-in blackbox for tuning.
It can easily carry a Session or Runcam 3 with a bottom mounted lipo battery, but you can top mount at the cost of an HD cam.
These motors are great middle-tier motors, so you've got a wide variety of prop options. I'd probably avoid running 5051s, but you should be fine running up to 5048s.

 Apart from the parts listed below you'll need a few additional items that no bench should be without:
  • A nylon nut set with 2mm nuts and 1mm spacers
  • Shrink tubing
  • 20awg wire
  • Double sided tape
  • Zip ties
  • Blue loctite

Part List

FrameFrog Race Frog Lite 218mm Carbon Fiber 4mm Arm X Frame DIY Frame Kit (4 builds) $27.99
Flight ControllerOmnibus Betaflight F4 Flight Controller V1 STM32 F405 MCU Integrated OSD (17 builds) $24.49
ESCsTATTU 30A BLHeli_S ESC (2-5S, w/Dshot, No BEC) for FPV RC model (4pcs)  $67.96
Motors4x Emax RS2205S 2300KV Racing Edition Brushless Motor for FPV Racing (25 builds) $74.00
PropellersDAL Cyclone Tri-Blade 5″ Prop – T5046C 5″ (50 builds) $2.99
FPV CameraRuncam Swift Mini 130 Degree 2.5mm Micro FPV Camera Build in OSD PAL/NTSC Orange/Black 22*22mm (8 builds) $34.99
FPV TransmitterEachine VTX03 Super Mini 5.8G 72CH 0/25mW/50mw/200mW Switchable FPV Transmitter (70 builds) $13.99
ReceiverFrsky XM+ Micro D16 SBUS Full Range Receiver Up to 16CH (66 builds) $12.99
BatteriesTattu R-Line 1550mAh 95C 4S1P lipo battery pack with XT60 Plug  $44.88
Misc PartsRunCam RC21/RC23/RC25 FPV Lens 2.1mm/2.3mm/2.5mm FOV 165/150/130 Degree Wide Angle for Swift Swift2 Mini $8.99
Marking it Fit

The frame is a little tight, but they offered some extension pieces to raise the stack area by about 4-5mm. If you have a large RX you may need to use them, but an XM+, X4R or Spektrum Satellite should fit fine without them. There's very little documentation, so it's not obvious what these are for. I've seen these extensions used on the back of the frame where the LED panel goes for stack protection and possibly a resting place for a larger antenna. The longer pieces only add about 1mm above the stack, so I don't see much reason to use these.

Finding the right standoffs to build the stack was a challenge, but I found the perfect combination. If you aren’t using the extensions you can use the 10mm screws to start to the stack. I added 2mm nuts with 1mm spacers. The spacers are important because you’ll end up with too much threading for the vibration dampening standoffs. These also offer just enough room to run a battery strap under the ESC board. While the 4-in-1 ESC came with an assortment of nylon standoffs, they’re all far too tall for this frame. You’d probably end up with a 30mm stack if you used those.
Wiring the Motors


Unfortunately EMAX hasn’t caught on to the 4-in-1 trend, so the motor wires were too short. Dig through your wire bin for some 20awg wire as you’ll need only about 12 inches of it. If you need to buy some, be sure to pick up some 14awg and 16awg just to have around for future builds. First you need to screw the motors onto the arms. Use some blue loctite to ensure the screws won’t wiggle loose. Now to extend the wires you want to lay each wire down onto the arm to get the length just right. Touch the end of the extension to the nearest ESC pad, snip, solder and repeat. Finish each joint off with some shrink tubing and you can optionally add some 550 paracord for added protection.
This 4-in-1 ESC is great because it has a 5v regulator that can handle up to 3amps. The Omnibus F4 also has a built-in 5v reg, but it doesn’t support enough amperage to run both the VTX and camera. The ESC plugs directly into the FC using the included connector and the 5v power is passed through the red wire. Now if you’d like a voltage reading via OSD you’ll also need to send power to the vbat pins, but the FC will favor the 5v from the ESC to power both itself and the RX. You’ll need to bridge the RAM and 5V pins to pass power to the VTX/camera.
One thing to note is that this FC uses a linear regulator to produce 5v from vbat. Since we aren’t using the 5v from the FC it will produce unnecessary heat. I didn’t do this, but it is an option if heat becomes a problem. You can also exclude vbat if you don’t need the OSD voltage reading. This would also reduce the heat.
One thing to note is this frame doesn’t come with an XT60 connector, so you’ll have to buy a set of them. I used the black ones listed in the part list. Snip the wires short enough that they won’t pull the battery leads into prop strike range, but not so short that your shrink tube shrinks before you can sleeve it over the terminals.
Mounting the Camera
I chose the Runcam Swift mini for the size and weight reduction, but the frame isn’t necessarily designed for it. You’ll have to use the included conversion bracket which offers a nice snug fit. It should be pretty clear which screw holes to use here, but if you have any questions review the photos below. The only thing I’d like to add is that you should use the nylon washers included with the Runcam outside the aluminum plates. This gives you a nice tight fit.
Wiring the Flight Control
This is a fairly straightforward wiring job, but be sure to pull up an Omnibus F4 board diagram to follow along. Mainly what you need to do is wire the camera and VTX and jump the 5v/RAM pins to send them power. Check the photo below for the big blob of solder just below the RX wires to see where to jump the RAM pins. This mainly passes the 5v from the 4-in-1 to the RAM pins along the VTX/camera rails. Also, I soldered the RX to the inverted UART which functions as UART1 in Betaflight. Finally, I passed power straight from the battery to the vbat pins to monitor voltage via OSD.


Mounting the RX and VTX
Since the XM+ antennas are extremely long I rotated the U.fl connectors to send the antennas back around the RX. This reduced the length by a few cm which offered the perfect length to send the antennas behind the front arms. You can see how I passed the antennas under the motor wires along zip ties secured with shrink tubing. To mount the VTX I added about 3 layers of double sided tape beside the display, added a wad of hot glue to the U.fl connector and taped it to the bottom of the top plate. I used a zip tie to keep the little dipole antenna from falling down into the props.

Configuration
If you wire the motors as illustrated they won’t be in the proper positions in BetaFlight, but BF 3.1 has a great resource command which lets you swap motor positions. You never need to worry about motor wire positions or swapping wires to set the rotation. All of this can be changed in software and allows for the cleanest wiring possible. Here’s a short checklist to follow before you maiden:
  • Flash firmware to the latest version of BF.
  • Use resource commands to order the motors.
  • Use BLHeli Configurator to set motor rotations.
  • Bind TX/RX and set inputs and ranges.
  • Set switches to arm and change modes.
  • Configure OSD.
  • Set your rates.
  • Use camera OSD to adjust your camera settings


2016年8月28日星期日

Introductory tutorial of FPV Drone

You will have fun if you are a FPV tyro expecting to operate a FPV drone casually but you have no suitable measures. Now we are providing a detailed introductory tutorial for you, hoping it can help you improve from an inexperienced rookie to a skillful veteran.


1. If you have never seen quadcopter, you need to buy a mini one like a toy. Although it looks very inconspicuous, but it has a genuine advantage that a formal FPV can't compare with.
Firstly, it is extremely difficult to operate a FPV. Operating a FPV excellently needs long-terms accumulated skills. It is inevitable to land unsafely. So we need a mini quadcopter with low price and high safety to practice.

Secondly, a broad flying space is needed to operate a FPV, but mini quadcopter has seldom requirement for flying, with which you can practice at home.
For the two reasons above, do not start directly with the machine if you have no contact with quadcopter, which is very expensive and dangerous.

2.
You can plan to buy a FPV when you are familiar perfectly with mastering a mini quadcopter.
After all, what kind of model should be chosen as the first FPV?

There are two kinds of FPV in the market. One is RTF (ready to fly) UAV which means you can operate it as soon as you get it. Another one needs you to choose and buy body frame, motor, screw propeller and relative electronic component, then assembly and test them.

If you have strong manipulative ability, we strongly recommend second plan because the process of DIY for UAV is full of pleasure. Moreover, you will get many various skills in the process, which will help you a lot in the future.

3.Structure of FPV drone

You have to be aware of the structure of FPV drone no matter what kind of plan you choose. A FPV can be divided into several parts below.
The body frame: the frame of the plane.

Four motors: used to drive the propeller rotation

Four ESC (electronic speed controller): used to adjust electric current and supply power for motors.

Four screw propellers: rotating generates pulling to drive the plane to fly

Flight controller: the brain of FPV controlling various flying posture

FPV Lipo battery: supply power for the FPV

Transmitter and receiver: used to transmit your control command to the FPV.

The components above can let the FPV fly and do some easy flying exercise. But if you want to enjoy real FPV, you need to ask help from the components below.

The camera and image transmission: used to transmit first view images seen from the FPV
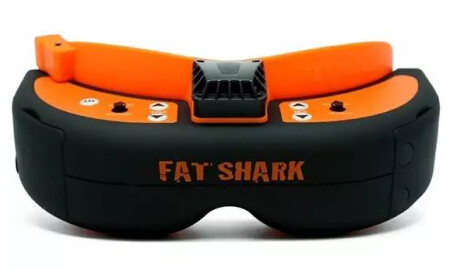
FPV glass or screen: used to output the image seen from the FPV and give you an experience you are operating the plane.

Antenna: used too enlarge the signal from image transmission.

Having equipped with all the components above, you will go into the world of FPV. If you want to share your flying video, a HD camera is needed.

4 .Flying

You can fly with your friend when you can master a FPV skillfully.

5.Cautions for safety

Firstly, do not flying in crowded place.
Secondly, ensure the UAV are free by adjusting image signal before flying
Thirdly, practice with mini quadcopter before flying FPV. Besides, you are suggested to try with FPV after you are familiar with mini quadcopter.
Fourthly, ensure the power is sufficient before your flying or prepare several spare batteries because over-long continuation of flying journey contents you more and avoids crash from air for lack of power. Tattu battery is suggested for its long-time continuation and strong explosive.